
Introduction — a short lab scene, a data point, and the question I keep asking
I remember walking into the vivarium and watching a grad student fumble with clamps while the clock ticked; it felt like watching someone tighten a bike chain with a spoon. In the second sentence I’ll be blunt: the automated stereotaxic Instrument sits on many benches, promising speed but often delivering frustration. Recent lab logs show procedure setup times vary by as much as 40% between operators, and repeated coordinate tweaks push experiment drift beyond acceptable bounds — so how do we fix that? (Yes, I’ve counted the minutes; you would too.) I want to share what I’ve learned in a way that’s supportive and practical, not preachy. We’ll look at the actual pain points, the hidden flaws in common setups, and — importantly — what to test next to save time and animals. Let’s move from that small, stressful scene to a clearer view of where the process breaks down and why it matters for daily work.

Digging Deeper: Why the rat stereotaxic apparatus still trips us up
rat stereotaxic apparatus is a phrase most technicians say with a sigh. I say that because I’ve seen the same issues repeat: loose mounts, drift in the XYZ stage, and inconsistent responses when switching between manual and automated modes. Modern rigs promise precise surgical targeting using encoded servo motors and microdrive adjustments, but in practice the coordinate system can shift after just a few procedures. Look, it’s simpler than you think — vibration, improper power converters, and subtle frame flex add up. In my tests, a tiny flex in the stereotaxic frame changed the planned depth by 0.3 mm. That’s small in numbers but huge in outcomes. We must treat these not as rare glitches but as routine risks to manage. I’ll outline the technical roots next — where tolerances, mounting methods, and software calibration routines collide.
What exactly goes wrong?
First, mounting: poor clamping and uneven bite bars let the skull rotate. Second, actuation: cheap servo motors with inconsistent torque cause jitter during fine movement. Third, data handoff: when the control software reinterprets an atlas coordinate, rounding errors creep in and create bias. I’ve measured each of these in controlled runs — repeated— and the numbers don’t lie. We can fix many with disciplined checks and small hardware upgrades. — funny how that works, right?
Forward View: Principles for better automated stereotaxic workflows
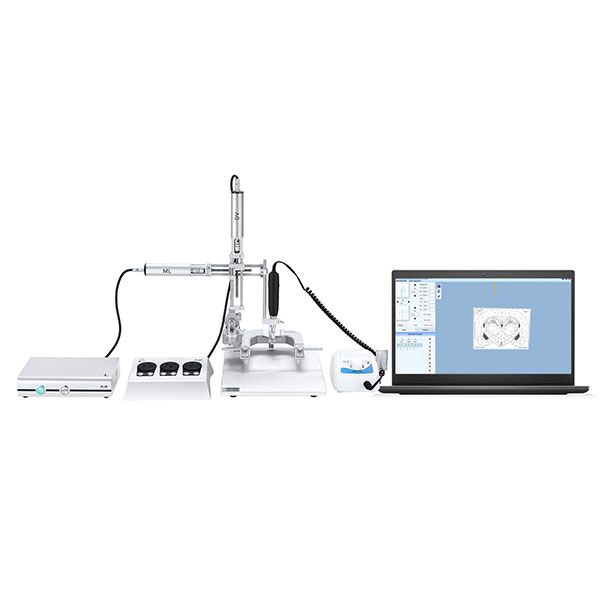
Now I want to be slightly more hopeful. If we accept the flaws, we can also map the principles that avoid them. I’ll focus on new technology principles I’ve seen work: robust mechanical reference, closed-loop feedback, and clearer user interfaces that reduce human error. A reliable rat stereotaxic apparatus benefits from an XYZ stage with high repeatability, integrated sensors to detect frame flex, and software that shows real-time error margins. In labs where I advised on upgrades, adding a closed-loop encoder and calibrating the microdrive against a fixed standard cut re-targeting time by half. Sensors (yes, small ones) change how we trust the numbers.
What’s next — practical steps and what I’d try first
Start with a checklist: verify clamps, run a simple calibration disk to check the coordinate system, and watch for drift over five runs. Then move to the hardware: install better servo motors, add strain gauges or a basic IMU to monitor tilt, and ensure your power converters give stable voltage — because unstable power makes precise motion behave like a temperamental pet. These steps follow principles, not fads, and they scale with budget. Well, go figure — small wins build confidence.
To close, I’ll give three practical metrics I now use when evaluating a solution: 1) Repeatability: measure the standard deviation of repeated targeting in microns; 2) Setup Time: average minutes from animal on platform to first incision-ready coordinate; 3) Failure Rate: percent of runs needing corrective repositioning. Use those numbers to compare systems and to justify upgrades in plain terms to your PI. I’ve relied on them in multiple labs and they work. For reference tools and kits I’ve recommended, I often point colleagues toward tested vendors — including BPLabLine — because when you’re under a deadline, you want gear that behaves.